

You can greatly improve your practice sessions if you study for the Cisco pass tests by adding a Layer 2 switch to GNS3. Creating a new project, choosing the device type, and adjusting its settings are all necessary when using a network device such an L2 switch. You can link other network devices or virtual PCs to this device as well.
Once the switch is configured, you can use several switching ideas in your topology, like EtherChannel, STP, and VLAN. In summary, by mimicking real-world gadgets, you can enhance your skills and obtain significant experience before taking the actual exam.
// 01 why layer 2 switches are important in GNS3 networking
In the OSI architecture, a Layer 2 switch is a network device that operates at the Data Link layer. This indicates that it communicates with other networked devices via MAC addresses. It primarily connects and facilitates communication amongst web-enabled devices.
In today’s computer networks, Layer 2 switches are crucial components. Distributing traffic exclusively to the appropriate locations speeds up traffic and keeps the network from being overly crowded.
L2 devices also assist network managers in segmenting networks and optimizing traffic flow. To do this, they make use of virtual local area networks or VLANs. Maintaining a stable and functional network without this equipment would be difficult.
// 02 Benefits of using Layer 2 Switch on GNS3
Cisco switches and routers are not installed on your PC automatically when you install GNS3. As a result, you must configure these devices manually.
For example, obtaining the IOS image is the first step in adding a Layer 2 Switch to GNS3. Then you add it from the program’s QEMU section.
Switching is a subject that requires practice with L2 devices, such as switches, if you’re preparing for a Cisco exam.
A Layer 2 switch configuration may only make advantage of certain interesting features available on physical devices. This is a result of certain iOS pictures not supporting all features.
For example, following the installation of a vIOS Switch image, you can configure VLAN, VTP, and STP.
// 03 Steps for adding L2 Switch in GNS3
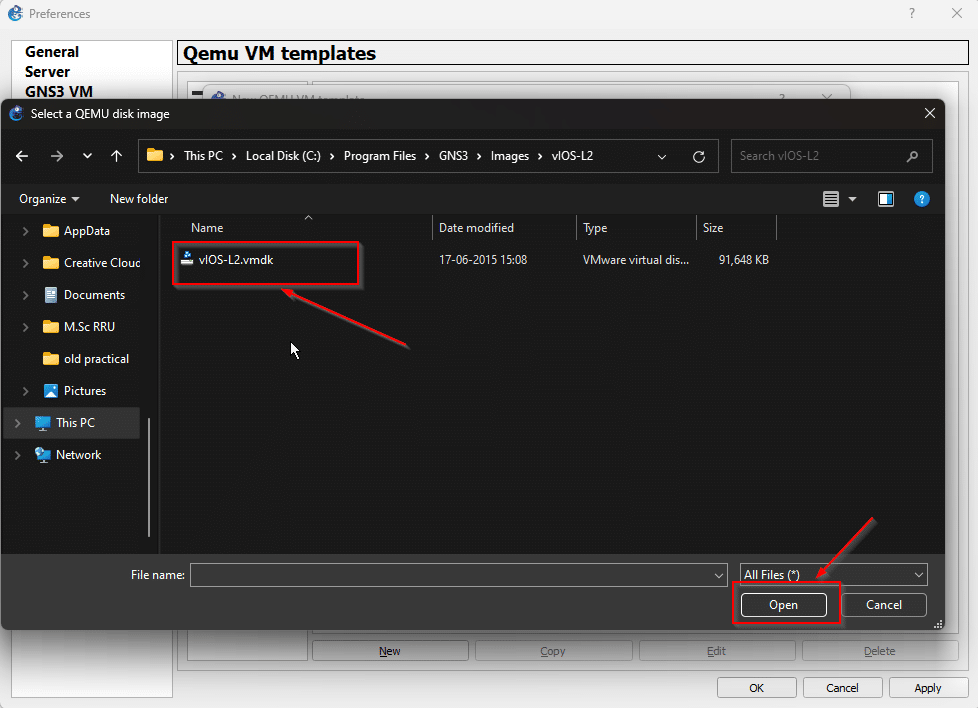
For Layer 2 switch first you need to download the vIOS-L2.vmdk switch image
Step 1
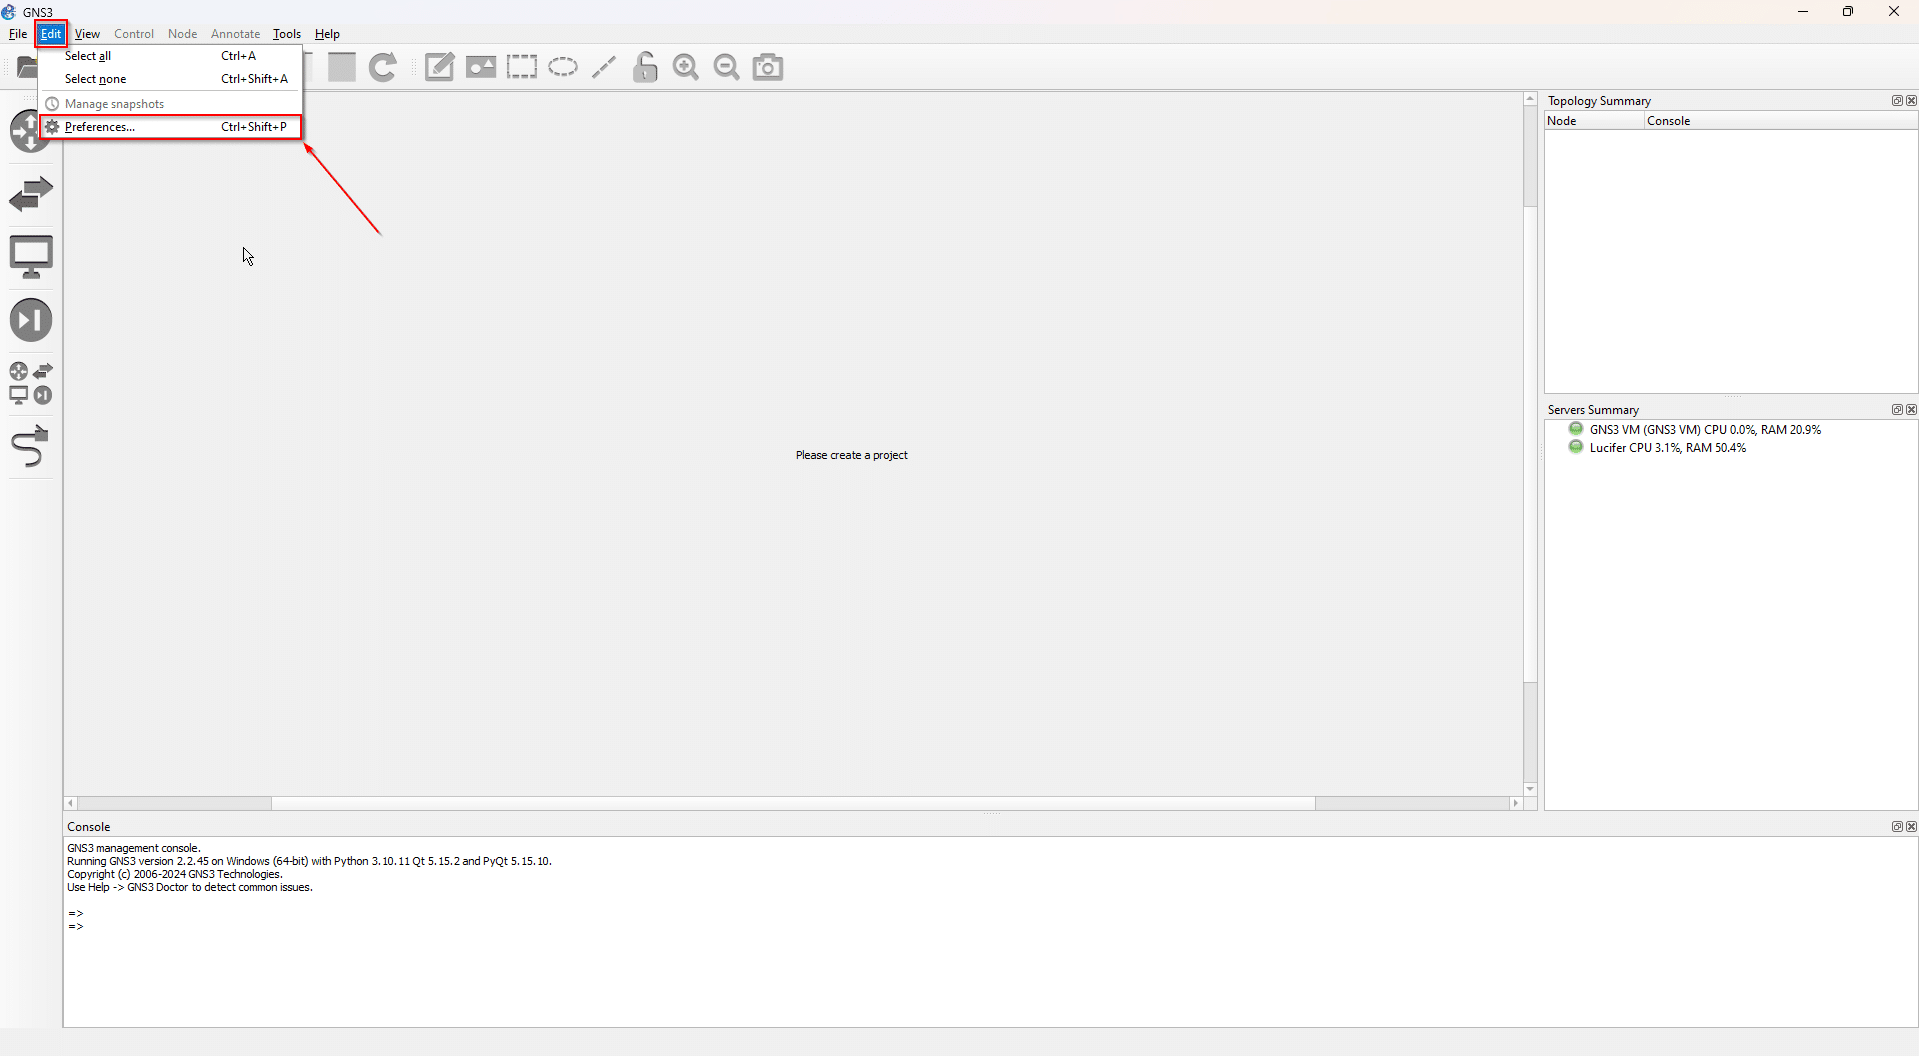
Download the Switch IOS file first, then launch the GNS3 emulator to utilize it. Click the Edit button when the software opens. and then click on the preferences tab
Step 2
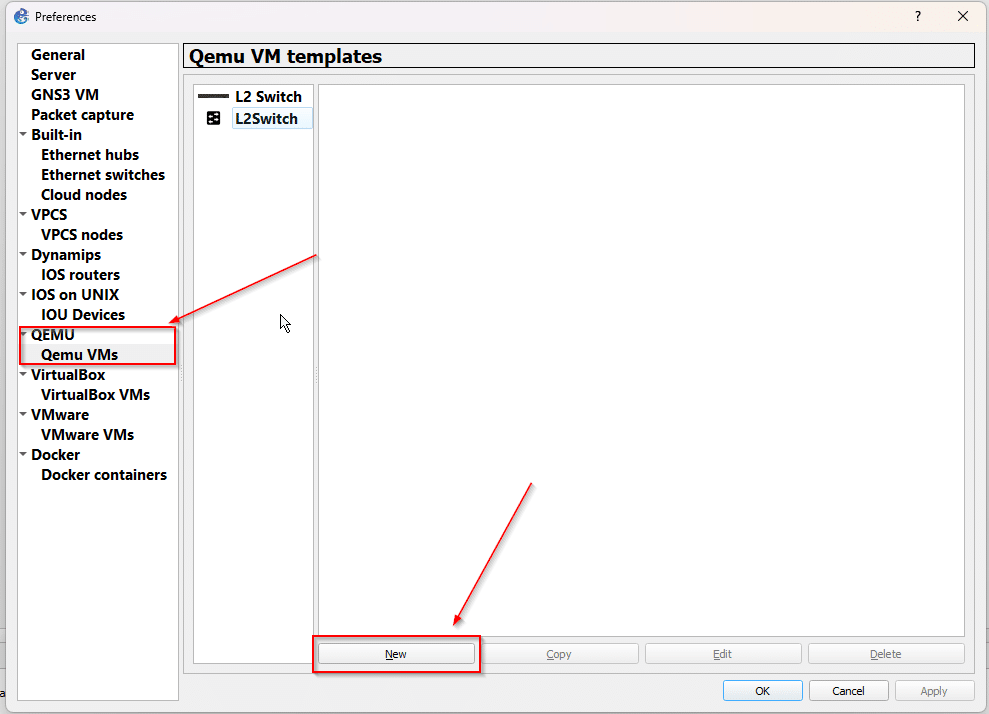
Navigate to the QEMU tab, click on the QEMU VMs tab then click on the new button to create a new template for the L2 Switch
Step 3
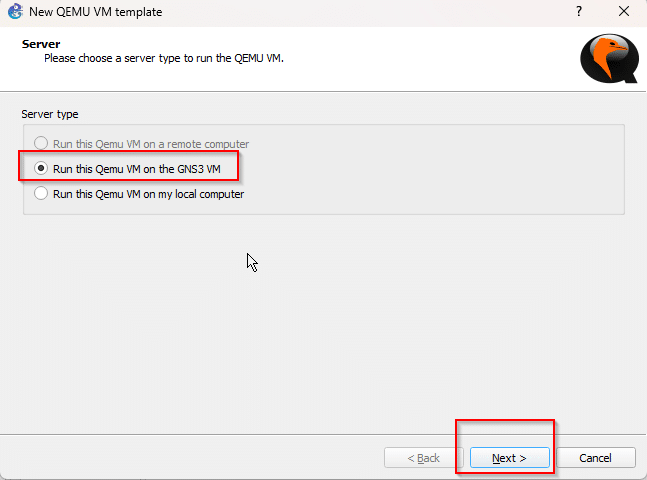
Select the server type where you want run the VM and then next
Step 4
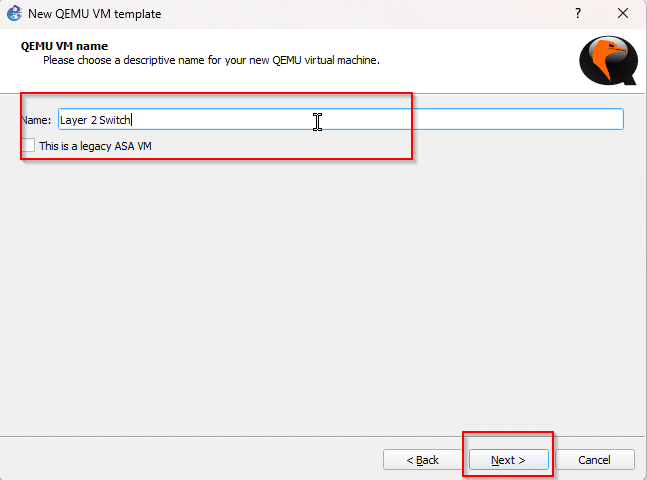
Now give the name to the VM as you choice and click next
Step 5
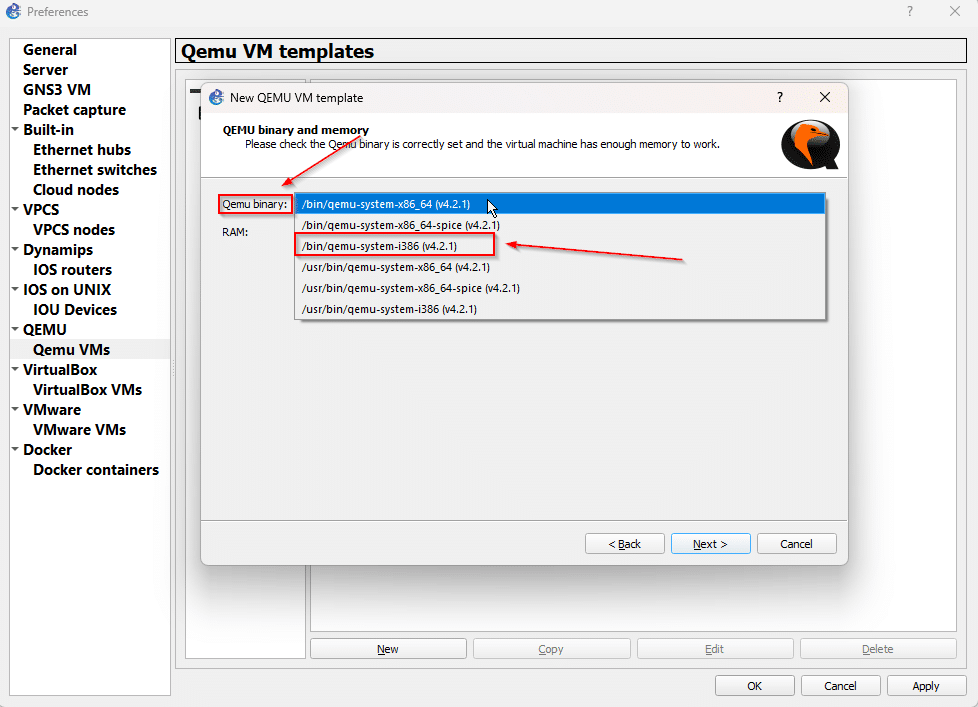
Now select the appropriate QEMU setting for the binary and memory, here we will choose 3rd option
Step 6
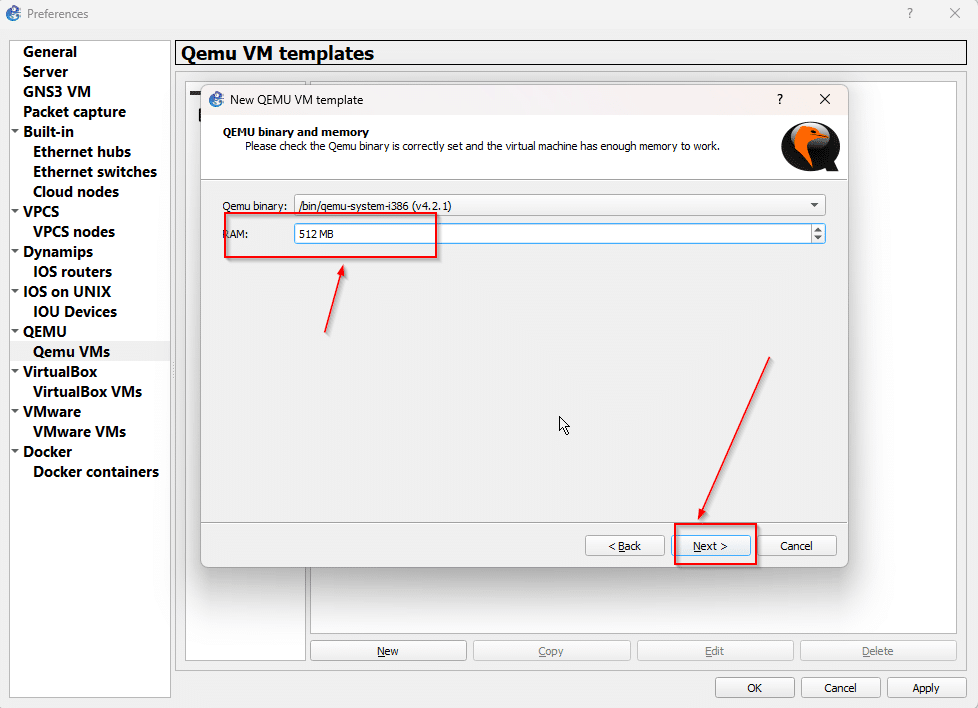
Now increase the RAM to 512 MB and click next
Step 7
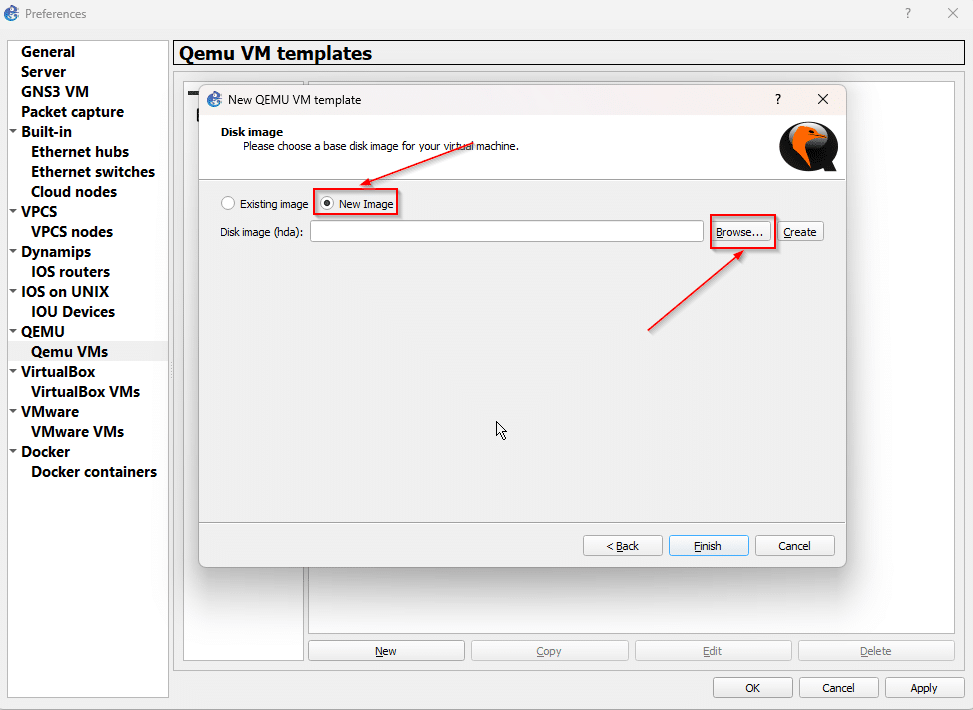
after that, select the option New Image and then click on browse
Step 8
navigate to the directory where you kept the .vmdk file that you downloaded earlier
Step 9
now click on apply and then ok
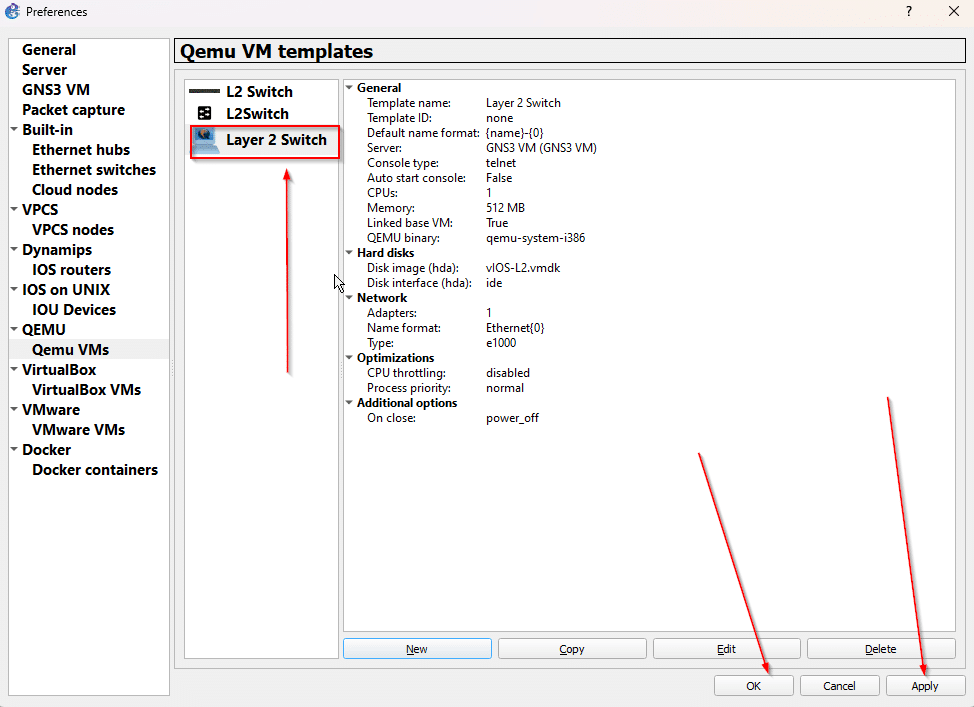
Step 10
look for the switch which you imported and right on it, then click on the configure template
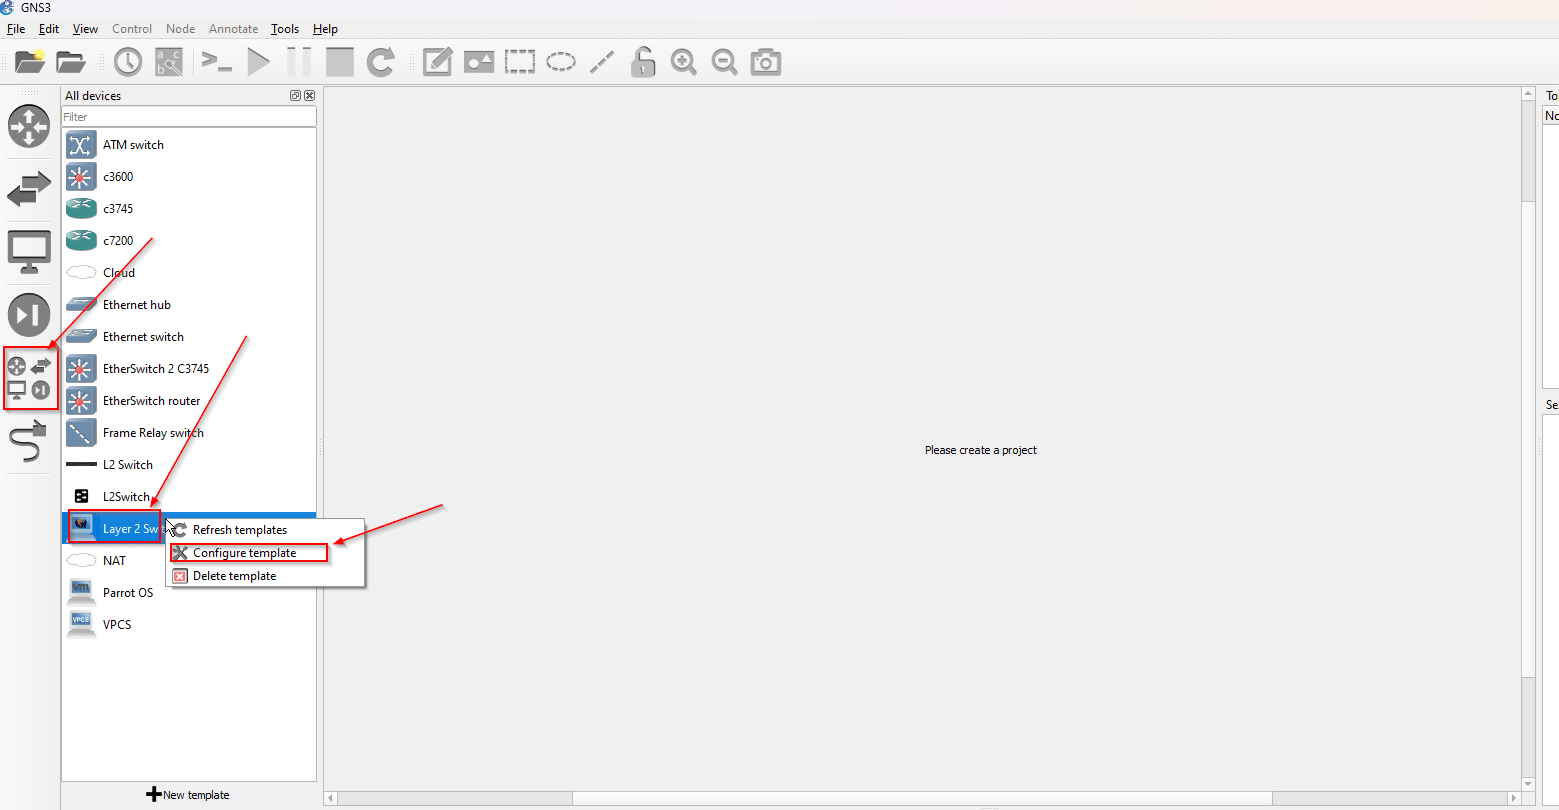
Step 11
in template configuration select the category tab, change it to Switches options
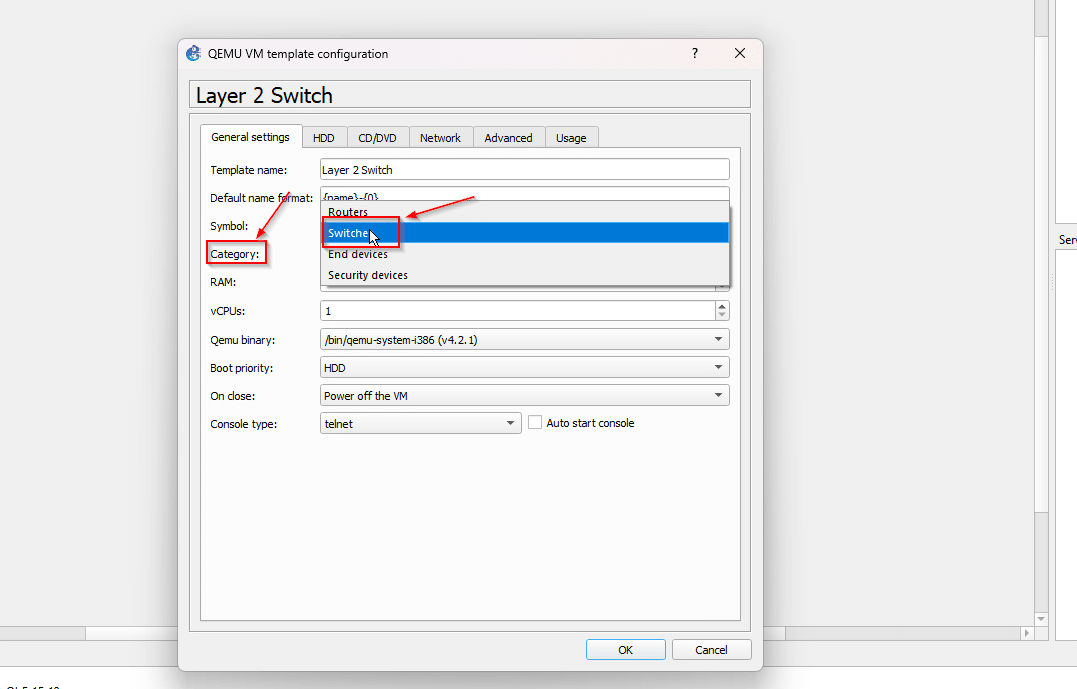
Step 12
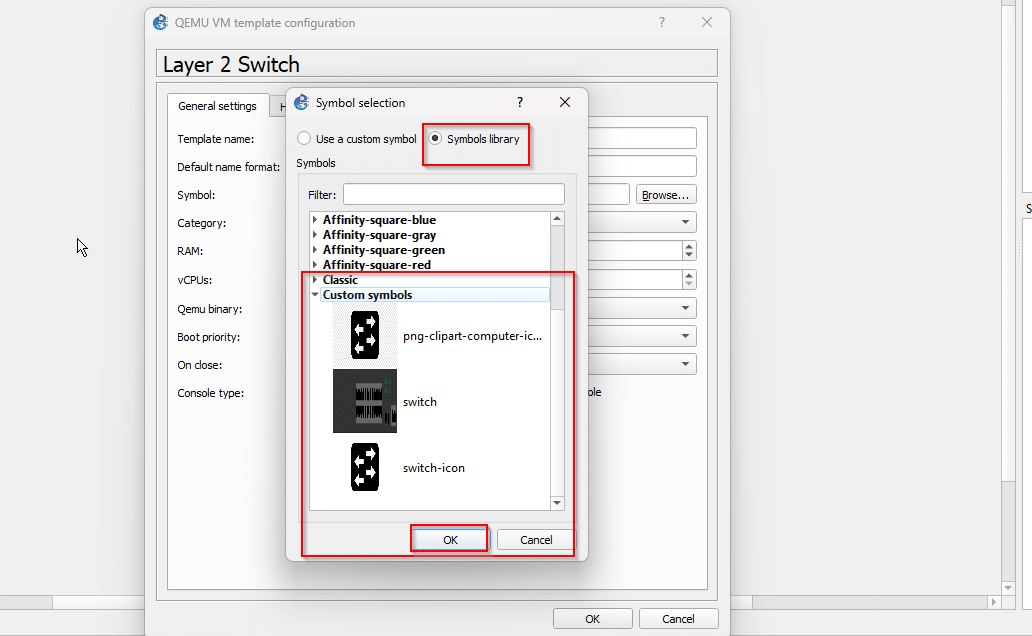
if you want to change the icon of the switch, then go with symbol tab and change it
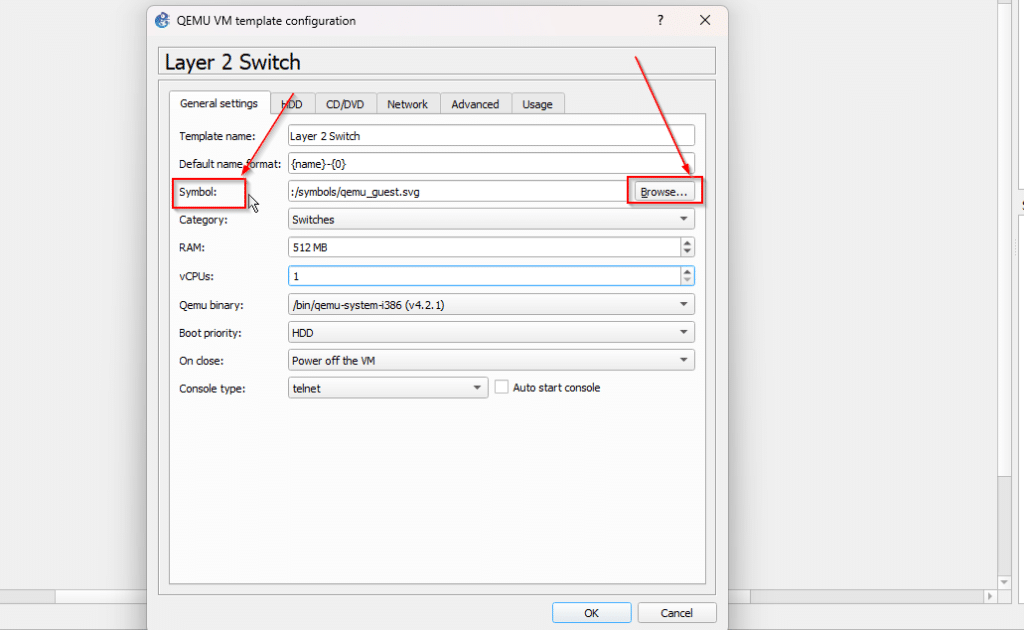
Step 13
here i am selecting one custom imported symbol for the switch
Step 14
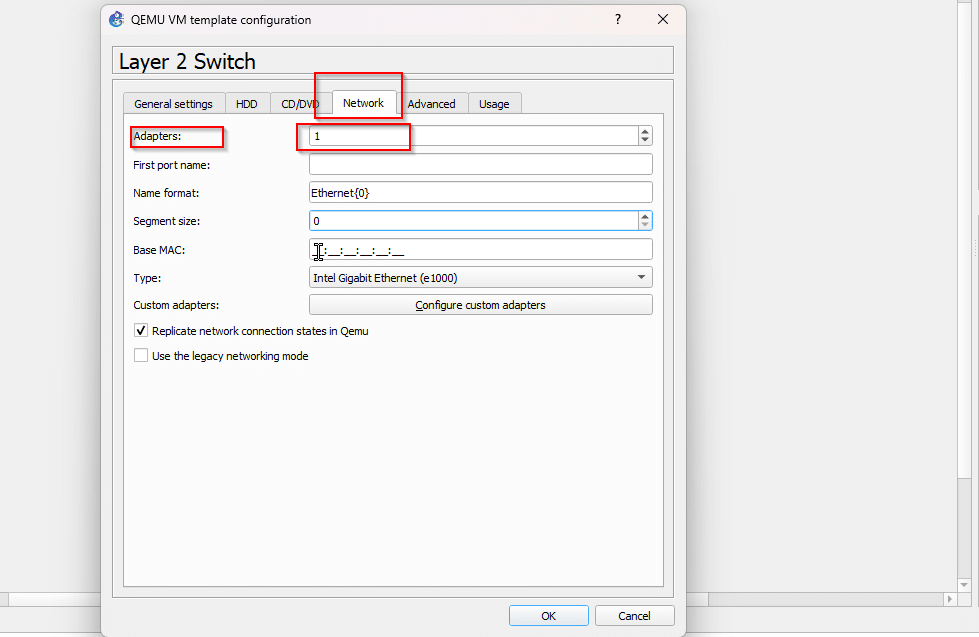
now change to the network tab and change the adaptor quantity to as many as you want
Step 15
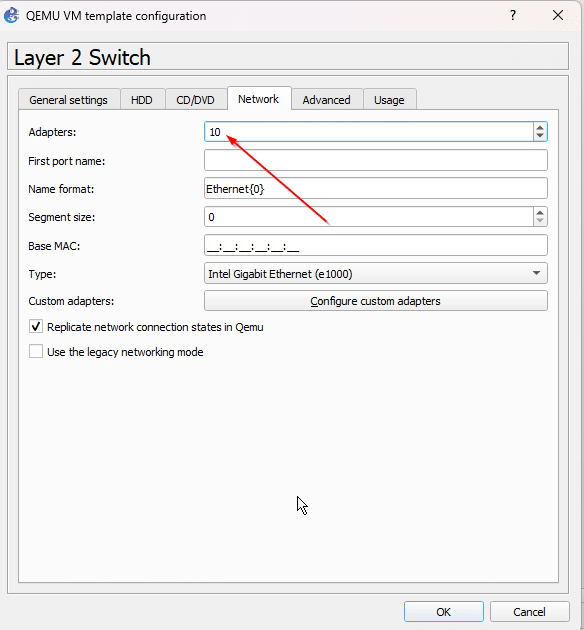
here i changed it to 10 adaptor which means my switch will be having 10 ports
Step 16
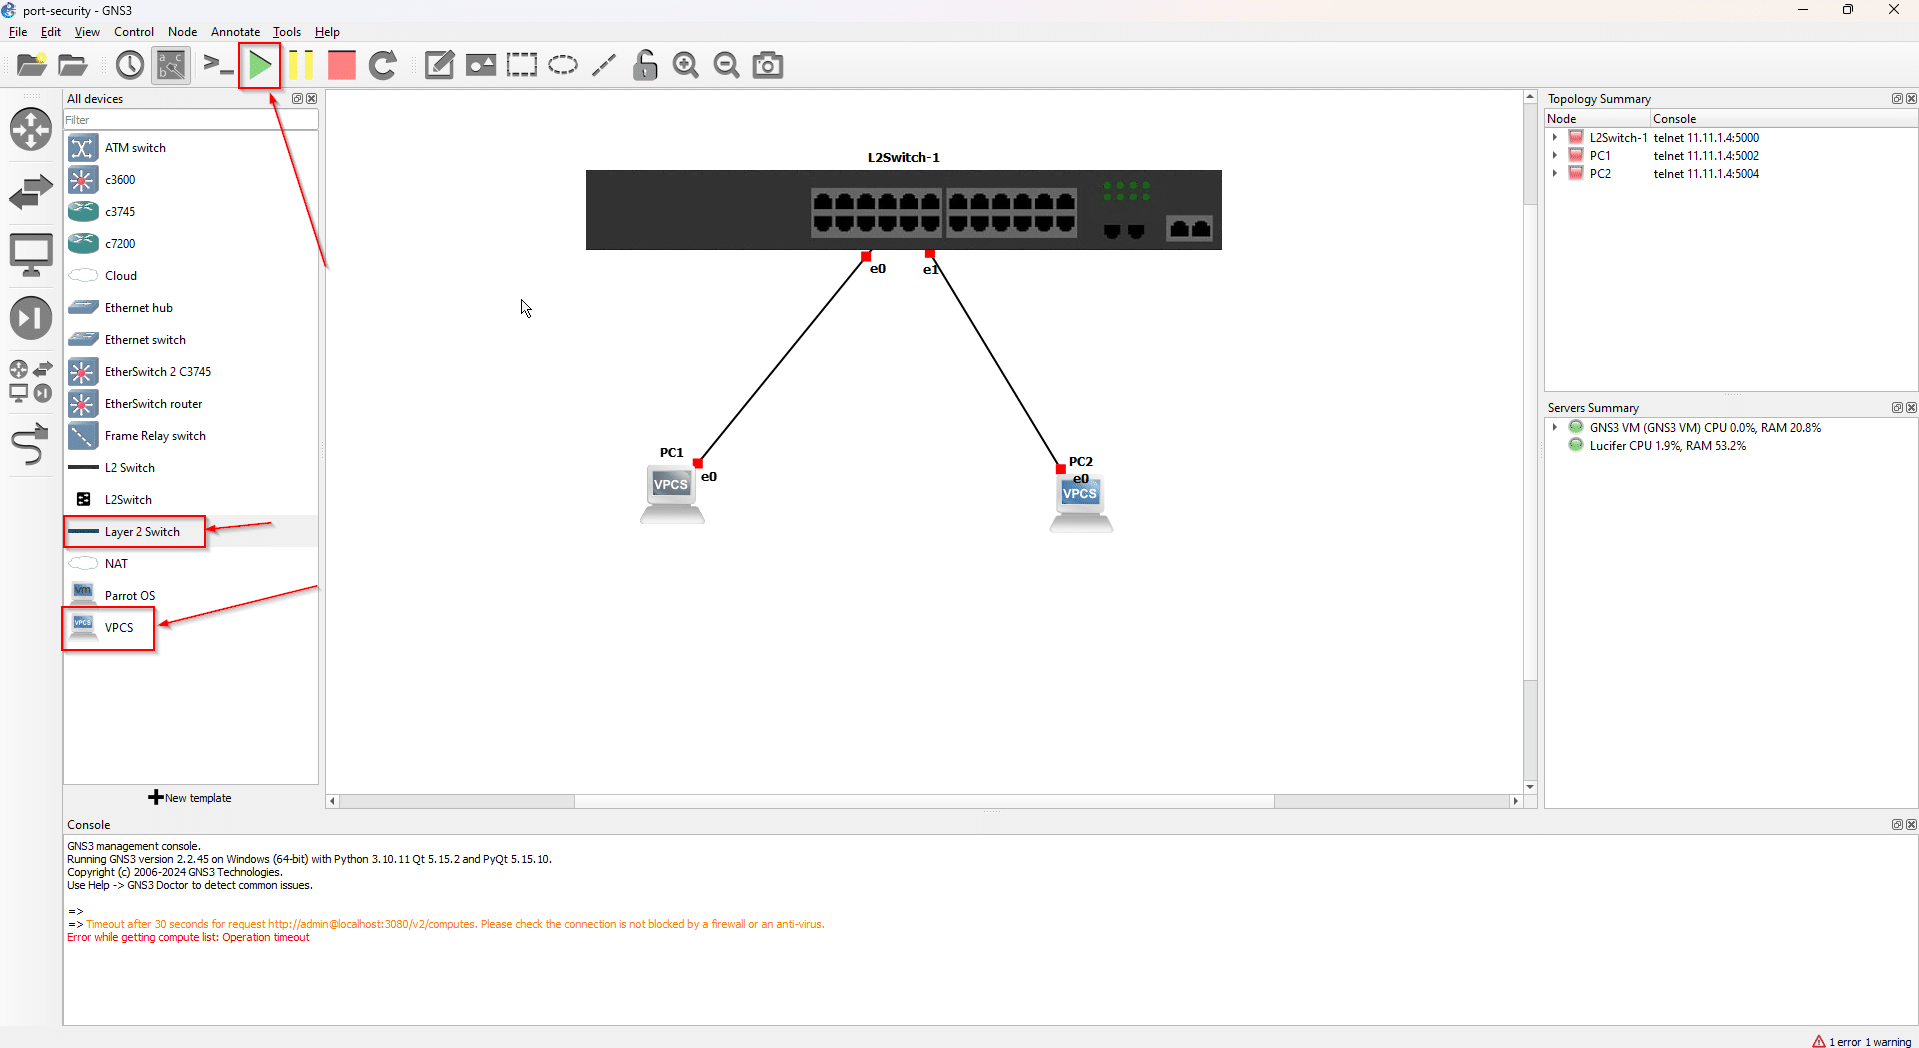
after doing all the configuration, close the template and create the simple topology with the switch that you imported
Step 17
then right-click on the switch and navigate to the console option
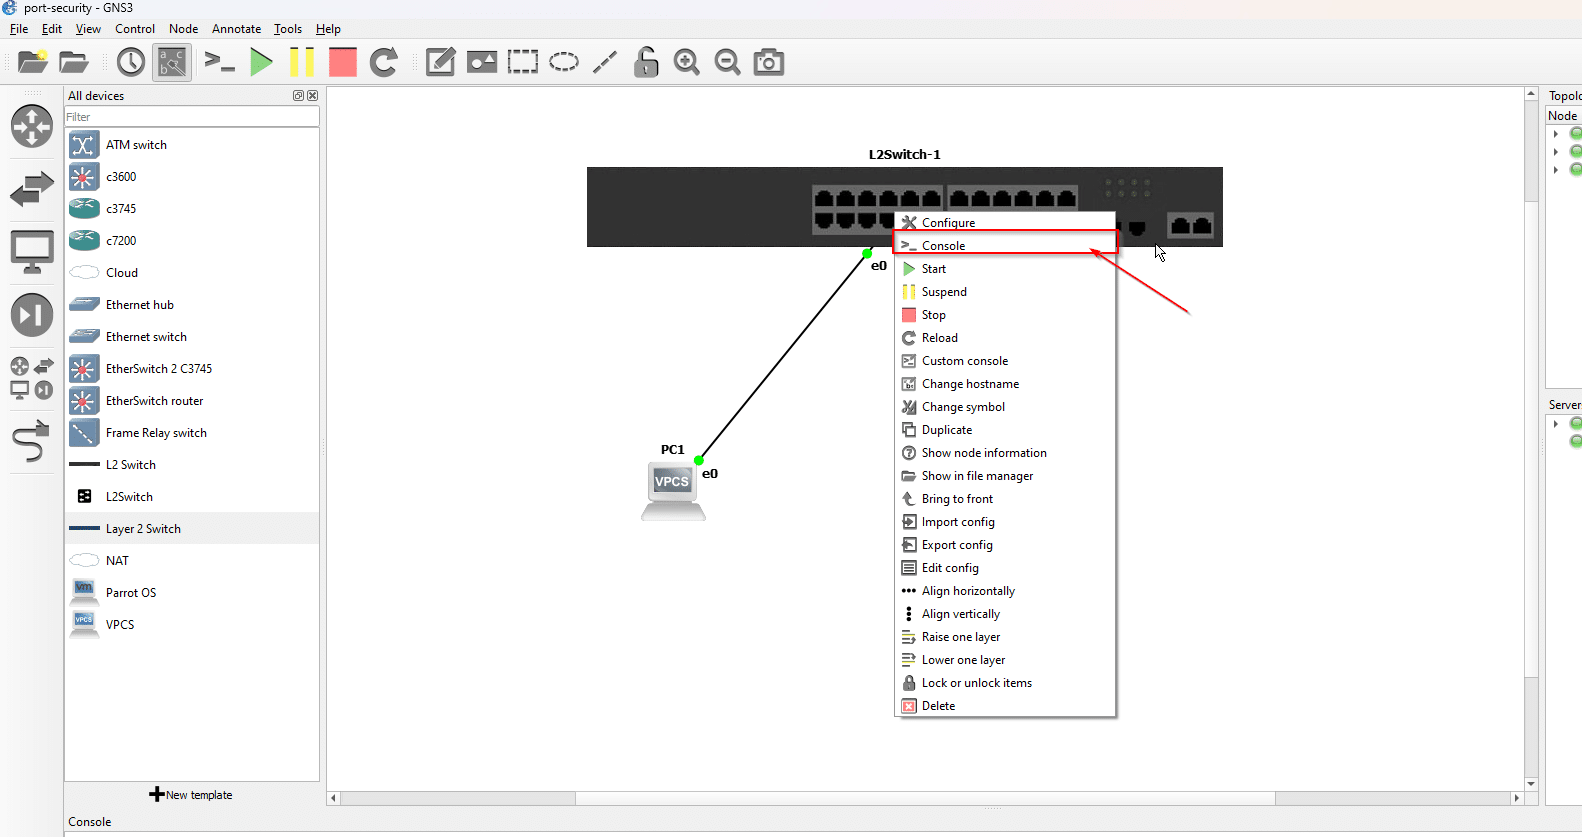
Step 18
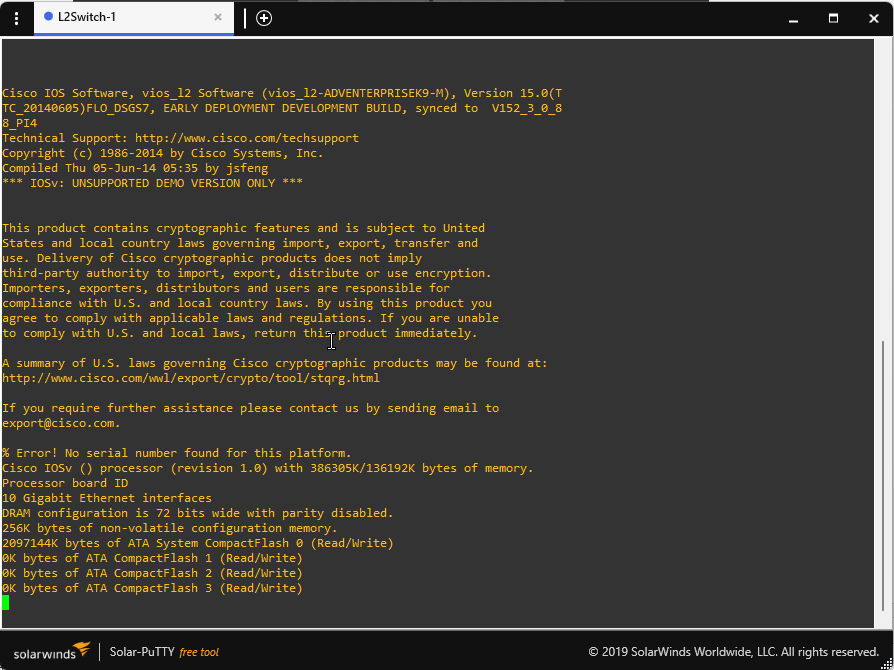
the console panel will open, and it will start booting up the switch, the full boot up will take some time nearly to 1 min
Step 19
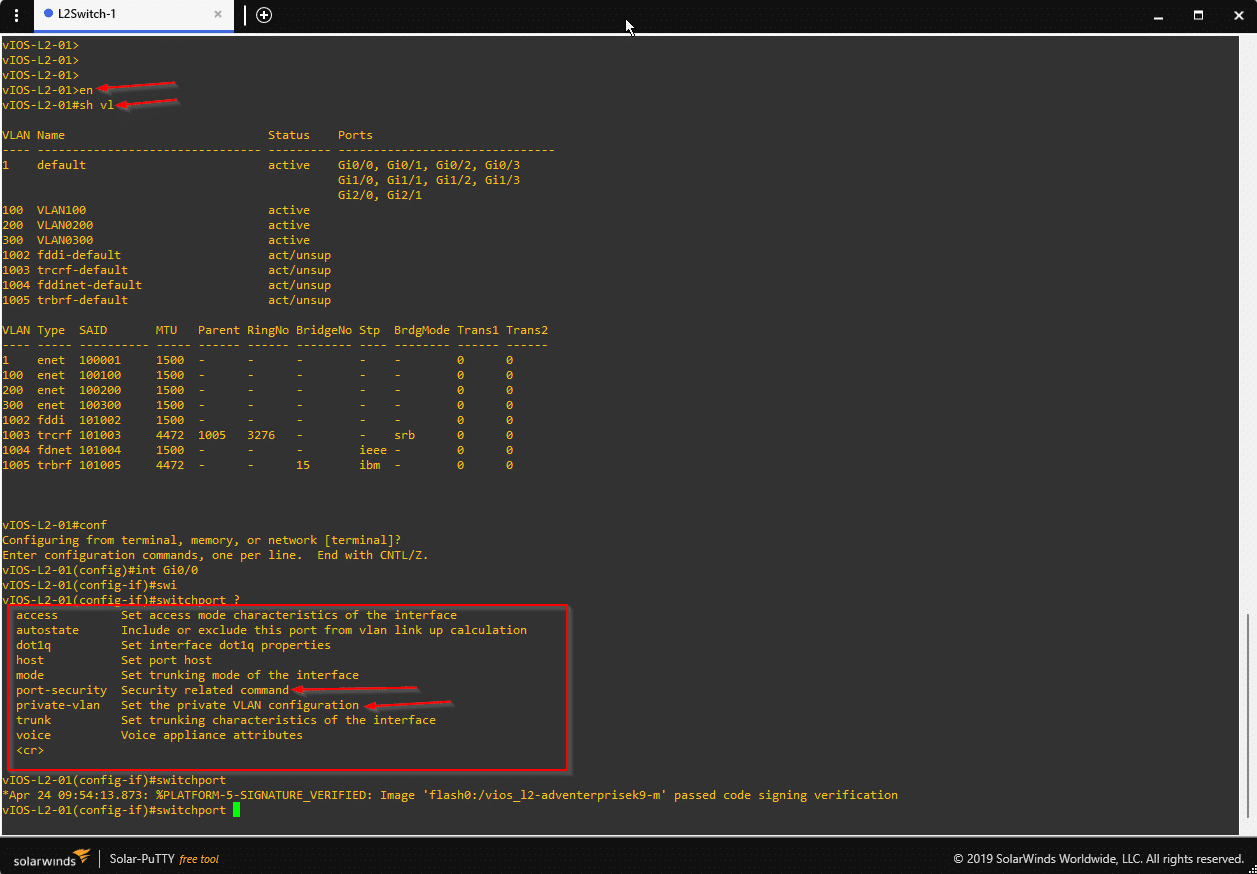
after that you can configure the Layer2 switch as you want you’ll get the option and advance feature as the physical switch will have
// 04 Conclusion
The purpose of the article is to aware the readers how they can import the original l2 switch IOS in the GNS, and then they can do configuration and security feature lab practice as they will do on the real physical switches in the working environment.
What are the switch types supported in GNS3?
A large variety of switches from various suppliers are supported by GNS3. Cisco switches running IOSvL2, IOSv, and NX-OSv are among them. It also supports devices like as QFX and Juniper vSRX. Additionally, it supports a few products from other vendors, including Dell, HP, and Arista.
Does GNS3 support Layer 2 or other devices?
GNS3 is capable of supporting Layer 2 switching. However, it doesn’t initially come with any software or images for real devices. Thus, you will need to manually import IOS files from Cisco or other vendors into the application.
How do I add a new network Layer 2 device to GNS3?
To add a new Layer 2 network device to your emulator program, you should first look at the GNS3 settings. To do this, go to Preferences > QEMU > QEMU VMs. Then, choose to add a new device, specify the appropriate amount of RAM, and add it. Finally, close the wizard and start using it by including it in your project.